
The Shift-by-Shift Printhead Maintenance Schedule That Actually Gets Followed
Posted by Thermal Printer Supplies on Aug 31st 2026

By Thermal Printer Supplies | Printer Maintenance | Printhead Life Extension Guide
We have separate guides covering how to clean a printhead and what causes printhead failure in detail. This one is specifically about frequency and process: when exactly to clean, what to check while you're there, and how to build the routine into shift operations so it actually happens consistently rather than when someone remembers to do it.
Why the Schedule Matters More Than the Procedure
Printhead lifespan is measured in linear inches printed, not in months. A printer running 50,000 inches of labels per day in a high-volume warehouse wears its printhead significantly faster than one printing 5,000 inches per day, regardless of how much calendar time passes. In a warehouse environment, that high daily print volume means the window for contamination to build up, heat settings to creep up to compensate, and wear to accelerate is much shorter than it would be in a lower-volume setting.
The single most effective intervention is cleaning frequency. A clean printhead runs at lower heat to produce the same print quality, which directly reduces thermal stress on the heating elements. A contaminated printhead runs hotter to push through the insulating layer of adhesive residue and debris, which accelerates element burnout. The difference between a printhead that lasts well past its warranty period and one that fails early is almost always cleaning frequency and consistency, not the quality of the hardware itself.
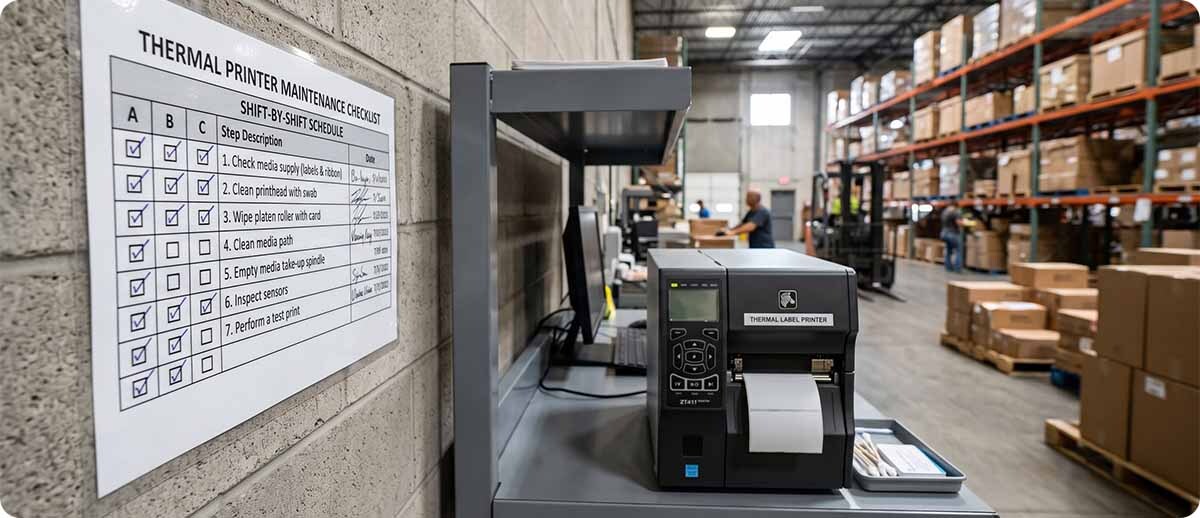
The Maintenance Schedule
At the start of every shift
Checklist:
☐ Print a test label and visually inspect for voids, faint areas, or vertical white lines
☐ Check darkness setting on the printer display. If it's been adjusted up since the last check, investigate why before accepting the setting
☐ Confirm media and ribbon are loaded correctly and seated properly
☐ Visually inspect the platen roller through the media path for visible adhesive buildup or debris
The start-of-shift test label takes about 30 seconds and catches most developing issues before they affect a production run. A darkness setting that's been creeping upward is a reliable early indicator of printhead contamination. When the printer is running hotter than it should to produce acceptable output, cleaning almost always brings the setting back down and improves quality simultaneously. If the test label shows a consistent vertical white line in the same position on every label, that's a blown heating element rather than a contamination issue and indicates the printhead needs replacement rather than cleaning.
At every media and ribbon change
Checklist:
☐ Clean the printhead with a 99% IPA wipe or lint-free swab before loading new media
☐ Wipe the platen roller in the same motion to prevent residue transfer from roller to new media
☐ Allow 30 seconds for IPA to evaporate before closing the printer and loading media
☐ Confirm the replacement media matches the printer's current darkness setting, and adjust if switching to a different label stock or ribbon type
This is the most important maintenance interval and the one most operations skip. Every roll change is an opportunity for contamination from the previous roll to accumulate further rather than be cleared. IPA at 99% concentration is the only recommended cleaning agent. Lower concentration IPA leaves water residue. Other solvents risk damaging the printhead coating. Keep cleaning wipes within arm's reach of every printer so the cleaning step doesn't require going to find supplies, which is the most common reason it gets skipped.
If the printer is switching between label stocks or ribbon types at this change, verify the darkness setting is appropriate for the new combination. A wax ribbon setting is typically too low for a resin ribbon and too high for direct thermal media. Carry any necessary setting adjustments in a posted reference card at the printer rather than relying on workers to remember the correct settings for each combination.
At the end of every shift
Checklist:
☐ Clean the printhead and platen roller with a 99% IPA wipe
☐ Note the current darkness setting in the shift log. Flag any setting above the baseline for this printer and media combination
☐ Record the approximate remaining media and ribbon quantity so the next shift starts with this information
☐ Close the printer cover to protect the printhead from dust exposure during the off period
End-of-shift cleaning ensures the printhead starts the next shift clean rather than carrying contamination from the previous run. The shift log darkness note is simple but genuinely valuable. If darkness is trending up over several shifts, cleaning frequency needs to increase or media quality needs to be reviewed. Catching that trend early through a simple log costs nothing. Replacing a printhead that burned out because no one noticed the trend costs significantly more.
Weekly
Checklist:
☐ Run a printhead cleaning card through the printer to clean areas the IPA wipe may not fully reach
☐ Inspect the media path for debris, adhesive buildup, and dust accumulation
☐ Blow out the interior of the printer with compressed air to clear dust from sensors and the media path
☐ Check the platen roller for cracking, glazing, or uneven wear. A hardened or cracked platen roller affects media feeding and barcode print quality
☐ Review the darkness setting log from the week. Consistent upward trend means more frequent cleaning is needed or media should be reviewed
☐ Confirm the correct darkness setting is posted at the printer for each media and ribbon combination in use
The weekly cleaning card adds a deeper cleaning layer that reaches into the media path beyond what a surface wipe covers. The platen roller inspection is easy to skip because platen rollers degrade gradually, but a cracked or glazed roller causes media slippage that leads to skewed labels, misfeeds, and inconsistent print quality that looks like a printhead problem. Many unnecessary printhead replacements are actually platen roller problems. Inspect both on the same weekly cycle.
Monthly or at high-volume intervals
Checklist:
☐ Print a full configuration label and compare current darkness setting against the baseline for this printer
☐ Review print quality across a sample of labels from the past month for trending issues
☐ Confirm media and ribbon are from the same supplier and specification as when the darkness baseline was set
☐ Review whether any media or ribbon substitutions have been made since the last review and adjust baseline settings if needed
The monthly review catches drift that the daily and weekly checks might miss individually. A printhead that required a darkness of 12 in January and now requires 16 in March for the same output has accumulated something, either contamination the routine cleaning isn't fully clearing, or gradual element degradation. Reviewing against a documented baseline rather than relying on memory or worker intuition makes that drift visible and actionable before it becomes a failure event.

Warning Signs to Watch Between Scheduled Maintenance
Workers operating the printer daily are often the first to notice problems, but only if they know what to look for. These signs should trigger an unscheduled cleaning and inspection rather than waiting for the next scheduled interval:
Fading or uneven print quality across a label. If the barcode is printing lighter on one side than the other, or some areas of the label are fading while others are sharp, contamination on the printhead surface is the most likely cause. Clean immediately.
Darkness setting being increased by operators to compensate for fading. If someone has turned up the darkness setting to make the output look acceptable, that's a diagnostic signal, not a fix. Higher heat accelerates wear. Clean the printhead, bring the setting back down, and verify the output.
A consistent vertical white line on every label in the same position. This is the sign that distinguishes contamination from printhead failure. A line that appears on every label in exactly the same spot is a blown heating element. Cleaning will not fix it. The printhead needs replacement. Document the position and frequency of the line and contact us for a replacement.
Media feeding inconsistently or labels skewing. Check the platen roller first before assuming a printhead issue. A glazed or cracked platen roller is the most common cause of feed problems that present as print quality issues.
Cleaning Supplies at TPS
What you need at every printer station
K2-WIT100 EZ Wipes (100 count): Pre-saturated 99% IPA wipes for printhead and platen roller cleaning at every media change and shift boundary. Keep a box within arm's reach of every printer.
Zebra Printhead Cleaning Cards (105950-047): For weekly deeper cleaning of the full media path. Run one card through the printer after the IPA wipe for complete coverage.
Zebra Printhead Cleaner Kit (46902): Includes both cleaning cards and swabs for complete printhead and media path maintenance. Good kit to keep at the printer station for full scheduled maintenance cycles.
Shop Cleaning Supplies →
The Printable Version
The schedule above works best when it's posted at the printer rather than living in a browser tab. Print the checklist sections and laminate them for each printer station. A physical checklist at the printer removes the "I forgot" factor from the maintenance routine and gives supervisors a visible reference point for verifying the schedule is being followed during shift checks.
If you're dealing with premature printhead wear or recurring print quality issues that cleaning isn't resolving, fill out the form below. Tell us your daily print volume, your current darkness setting, and what the labels look like when the problem appears. We can usually identify the cause and point you to the right fix before you spend money on a printhead replacement that may not solve the underlying issue.